I know I keep mentioning this poster. Our first. Oh, the horror. The first time we tried to screen print a poster it was a whirlwind of trouble. One weekend of pure hell. If this project didn’t make us give up, nothing will. But I will explain all of the problems that we had and maybe that will help if you run into problems.
Before Freddy and I started screen printing, I had designed some posters and had them printed by several different screen printers, all of whom did a wonderful job. But it was time to do our own. We started small. Our first poster was 12” x 18” and 2 colors.
It started out just fine. I took some photos of Freddy posing with a skull I had laying around the house and did the sketch, inked it and did the separations, planning on a simple 2 color poster in classic red and black. Freddy got the poster press built and ready in time for the weekend printing session. We had the screens made for us at Standard Screen in Manhattan since we weren’t experienced at burning screens yet.
The posters I had drawn before were silk screened by other people and I had always done the separations myself. I was very sure to make the posters pretty easy to screen and give the screen printers good separations. But on this one, I got lost in the creative process and created a bit of a difficult registration issue. I did something that is generally not a good idea and had 2 colors need to line up precisely to look right. Below is an example of what I mean. The top picture is the black screen out of register and the bottom picture shows it correctly in register.
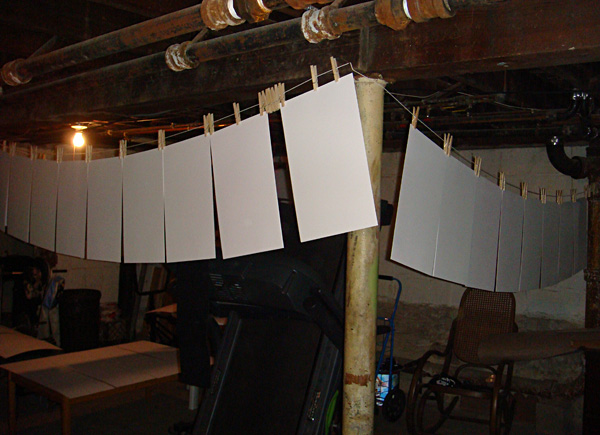
The press Freddy built is capable of very accurate registration... when it is working right. Anyway, I had done all of the research on printing posters so we began, thinking we knew what we were doing. We hung the paper up in the basement overnight to let it acclimate so that it wouldn’t change shape on us as it absorbed the humidity or changed temperature.
We started on our adventure. We ran into trouble almost right away. We could not get a good print out of the red screen. Below are some examples of the problems we had.
Here the ink squeezed out under the screen. And perhaps you can see that the texture of the ink is blotchy, not smooth like it should be. The ink we were using was too thick and needed to be thinned, but we did not know. We used the Speedball acrylic ink right out of the jar. Freddy had to press so hard to get it through the screen that it bled under the masked areas. And it was so sticky that it stuck the screen down to the paper and didn’t pop back up like it should even though we increased the off-contact (or space between the screen and the paper). Now we know that it may have been possible that the ink was spreading out under the stencil like that BECAUSE we increased the off-contact. Sigh.
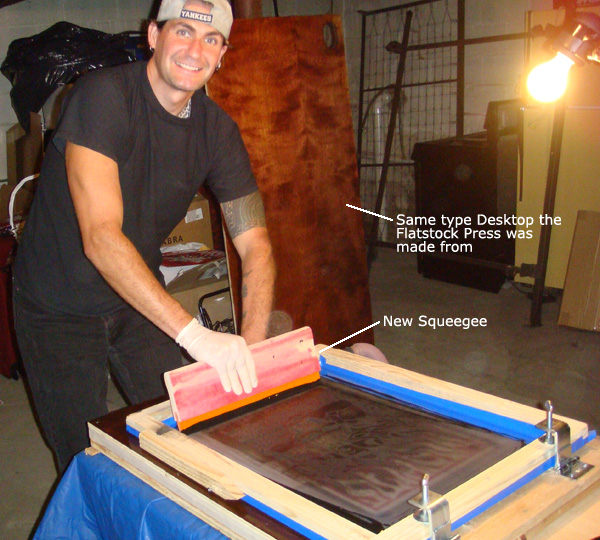
We also had problems with the ink not going on evenly and skipping some areas. Usually the same areas. We would later discover that we had a bad squeegee.
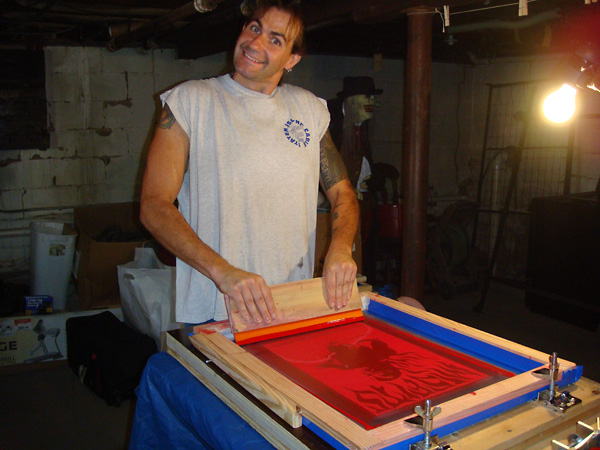
Here’s an action shot at our low point with the bad squeegee, bad ink and bad hinge clamps.
We tried to clean the screen out on the press after it would squeeze out like that, but it didn’t work. We would have to take the screen off and go wash it up and wait for it to dry. During one of these breaks, we re-watched a Speedball DVD we had and realized that perhaps the ink was too thick. So we thinned the ink to the consistency we had seen on the DVD and tried again. It was still hard and we ruined a lot of paper, but we finally got 60 good prints. It seemed like it took forever.
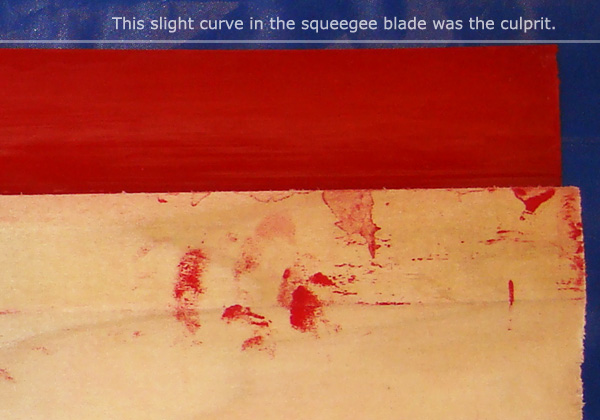
Once the red prints dried, we started trying to print the black screen. It was going worse than ever and now we were ruining some of the red prints we had screened. About that time, while we were cleaning up the screen for another try, Freddy noticed that the squeegee wasn’t straight. It had a slight curve on one end. That was one problem. He also felt like the black ink was too thinned out. So we found another squeegee and I mixed another batch of ink, thicker this time and we started again.
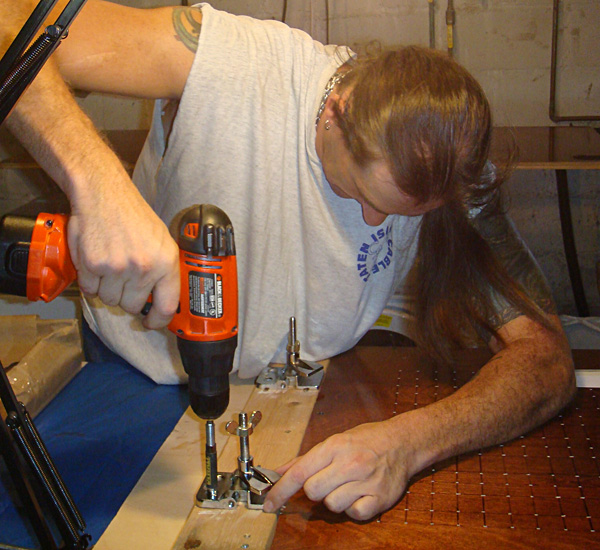
Everything was going wonderfully... until we noticed the black was going out of register. It wasn’t lining up and it was different on every print! We found the problem – the hinge clamps weren’t holding the screen tightly and it was slipping around. No matter how we tightened them with pliers and even vice grips, they would still loosen up.
So we took the Staten Island train to the Staten Island Ferry to (oh god why did I move to Staten island? Oh yeah, a house & basement.) Manhattan and then took the subway to the art supply store to buy the good hinge clamps that we should have bought in the first place. Sigh. But we hadn’t known. Buy Jiffy Clamps. Trust me on this. Here’s a picture. The Jiffy clamps and a discarded old, bad clamp.
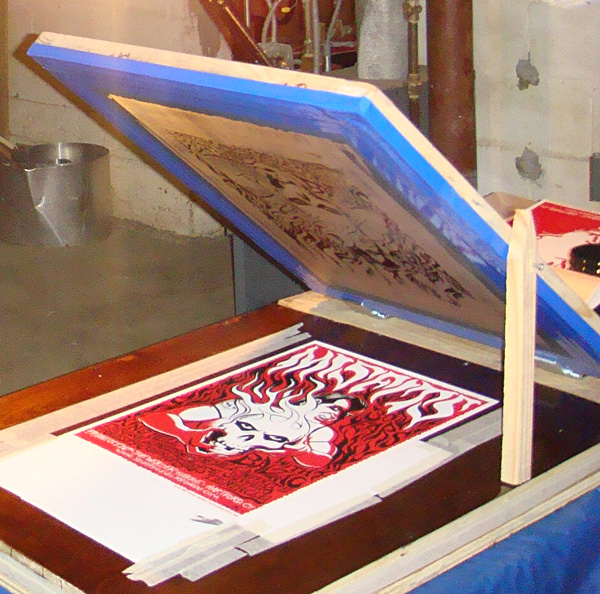
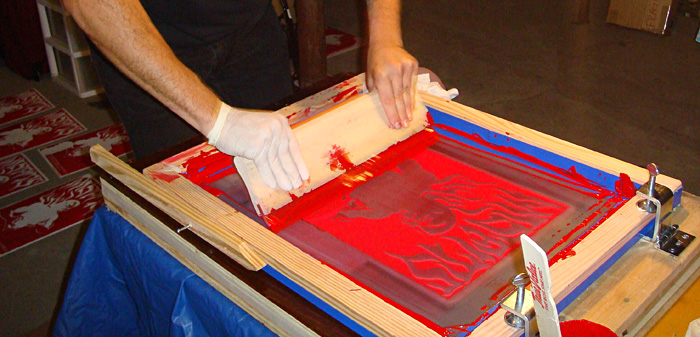
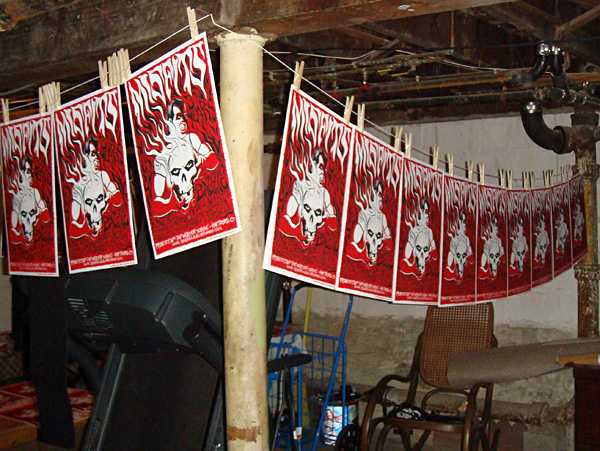
We mounted the new Jiffy Clamps and screened the rest of the black. At that point we were amazed at how easy it was. We finished screening the posters and they came out beautifully. We even managed to print my tricky registration with very little trouble at that point.
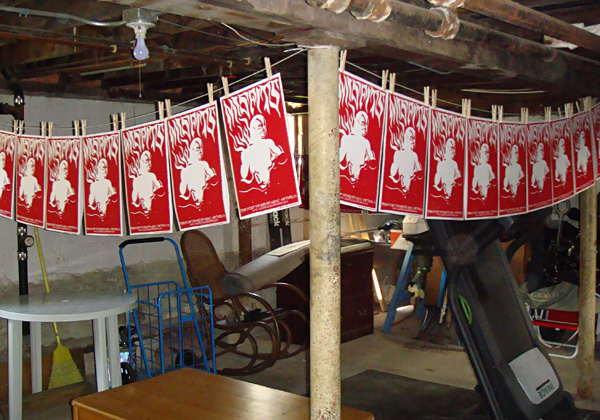
We finished up and hung the prints to dry. We celebrated our victory by watching a silly horror movie... somehow fitting.
Rawk!
Information and how to's with pictures for anyone interested in doing their own silk screen printing. Based on our adventures in DIY silk screen printing, by Deaths Head Designs.
Showing posts with label vacuum press. Show all posts
Tuesday, January 11, 2011
Wednesday, December 22, 2010
Building Your Own Vacuum Table Poster Press
Silk screen your own art prints for fun and profit!
I had been doing posters for a while and having them printed by other people (very beautifully, I might add, but it was pricey) but I knew that I wanted us to try and print our own posters. I did exhaustive research (it’s what I do), looking on the internet and in books. I searched out different methods on building a poster or flatstock press and asked some experienced poster screen printers’ opinions. And I came up with the idea of how to build our press. We scrounged up most of the materials in Freddy’s basement. It’s pretty easy to build with some very basic woodworking skills and tools.
1. You need something to make the top out of that is smooth and flat. We used an old desktop. You can use a nice piece of birch plywood. You could use a piece of countertop. I’ve seen someone use a thick piece of plexiglass that had been an old sign. As long as it’s smooth, flat and thick enough that it won’t flex under pressure, it’s ok.
2. You need some 5/8” plywood to cut into 3/4" strips to make the spacers for the middle part.
3. You need something to serve as the bottom. We used a piece of scrap plywood that was hanging around the basement. Any flat board that’s big enough would be fine. Even a table top. We found a table someone threw out that we plan to use to build our next, larger, press onto. Recycle, reuse, etc.
4. You need a vacuum cleaner. I had an old canister one that works great for the press and isn’t too large and cumbersome.
5. You need some hinge clamps. We bought the wrong ones at first and they didn’t hold the screen securely. So then we got some Jiffy Hinge Clamps. They are very common. Should sell for around $20-25.
6. And you’ll need a t-square to draw the grid, one or two 3/32” drill bits, some screws, wood glue or contact cement and clamps for holding the thing together once it’s glued until it dries. The main thing is to use enough glue and put the press together tightly enough so that it doesn’t leak air. Ours leaked air at first. We found the holes and filled them with glue. No big deal.
Here are some plans I’ve drawn up. There are no dimensions, but you just make your own press the size you need and adjust the dimensions to fit. You could use these drawings to make your own plans with measurements. It’s a very basic press. You can get very fancy with building a poster press. We didn’t. Ours works. ‘Nuff said.
Plan 1 - The top
Plan 2 - The inside and side view
Assembly Instructions
First you cut all the pieces to size. Most places that will sell you plywood, will cut it for you for free or for a small fee. The inside spacers are the most critical. You want the outer pieces to be at least an inch or so away from the holes you will drill and you want the thinner spacer strips to be 4 or 5 inches shorter than the interior space. See the diagram. Cut the spacer strips to about 3/4” wide by however long you need them, so they will be 5/8” x 3/4” x n.
Next use a t-square to draw a grid with all of the lines spaced 1 inch apart as shown in the first drawing. Drill a hole with a 3/32” bit at each intersection. You might need more than one bit in case it breaks. Once the top is done turn it upside down and glue and screw the spacer boards in place. The spacer boards are indicated in red on the 2nd drawing. Stagger the spacer strips as shown in relation to the vacuum hole. Make sure that the spacer strips are all turned the right way, with the 5/8” sides top and bottom and the 3/4” side to side fitting between the holes you drilled. You can use more spacers inside if you want, but I wouldn’t recommend using fewer. Leave a large enough space on one side to fit your vacuum hose or nozzle. One of those flat attachments works pretty well.
You leave an opening in the side (whichever side works for you) just big enough to insert the vacuum nozzle. We used a flat attachment, shoved it tightly into the space and affixed it with duct tape. I was NOT kidding about the lack of fancy building. But hey, it works.
The vacuum holds the paper in place while you screen print onto it and you just turn it off and on as needed. You can buy a foot switch or a hand switch to make it easier.
Then glue and screw the bottom piece on. Clamp it up with a few clamps and let it dry overnight. Attach the vacuum and try it out. If you have air leaks, plug em. We just squeezed some glue into the leaky spots and let it dry overnight. You can turn the vacuum to blow to check for leaks more easily. Or if yours doesn’t have a reverse, cover the vacuum holes on top and just use a strip of tissue paper to see if it gets sucked to any spots where it shouldn’t.
You mount the hinges in position and you are ready to go.
Here’s a photo of our press. The tape and paper on top are set up to print our first poster. Next time I will explain how that all works. Freddy built the press and then the top part where the hinge clamps go separately and mounted them to another piece of plywood. This was both because of the sizes of the wood we had and also so it could be moved easily and frequently. If you read about Our Clandestine Beginnings, you know why.
Here’s a picture of the insides of someone else's project since I didn’t get pictures of Freddy building ours.
Here’s a desktop like the one Freddy used to build the press. Freddy’s best friend and neighbor, Rose, donated this to our cause. Thank you, Rose!
Here’s Freddy installing the new, improved hinge clamps.
A closeup of the Jiffy Clamps and an old, discarded, unsuitable clamp.
To hold up the screen while changing out the paper underneath it we just screw a piece of scrap wood onto the side of the silk screen frame that acts as a leg and pivots. For aluminum frames they make a little gadget called a sidekick. Or you could get creative with it. I’ve seen a press where a guy had a string attached to the bottom of the screen, looped over a frame above and slightly behind the press and attached to a counter weight, a can of coins, that would hold the screen up in place. And he could adjust the weight by adding or removing coins. Heck, you could even just get someone to hold it up for you.
This is the AWT Sidekick
Here's a picture of the press in action.
Next time I will describe the process of printing on paper (flatstock), with and without a vacuum press, and how to print multiple colors.
Our posters are on sale at Deaths Head Designs!
Next: DIY Secrets to Printing Flatstock
Subscribe to:
Posts (Atom)